How to Set Up
SPARK
Follow this step-by-step guide to configure SPARK and start generating AI-powered test cases for your Jira projects.
Complete Setup Guide
Follow these steps to configure SPARK after installation and start generating test cases.
1.Access SPARK from Jira
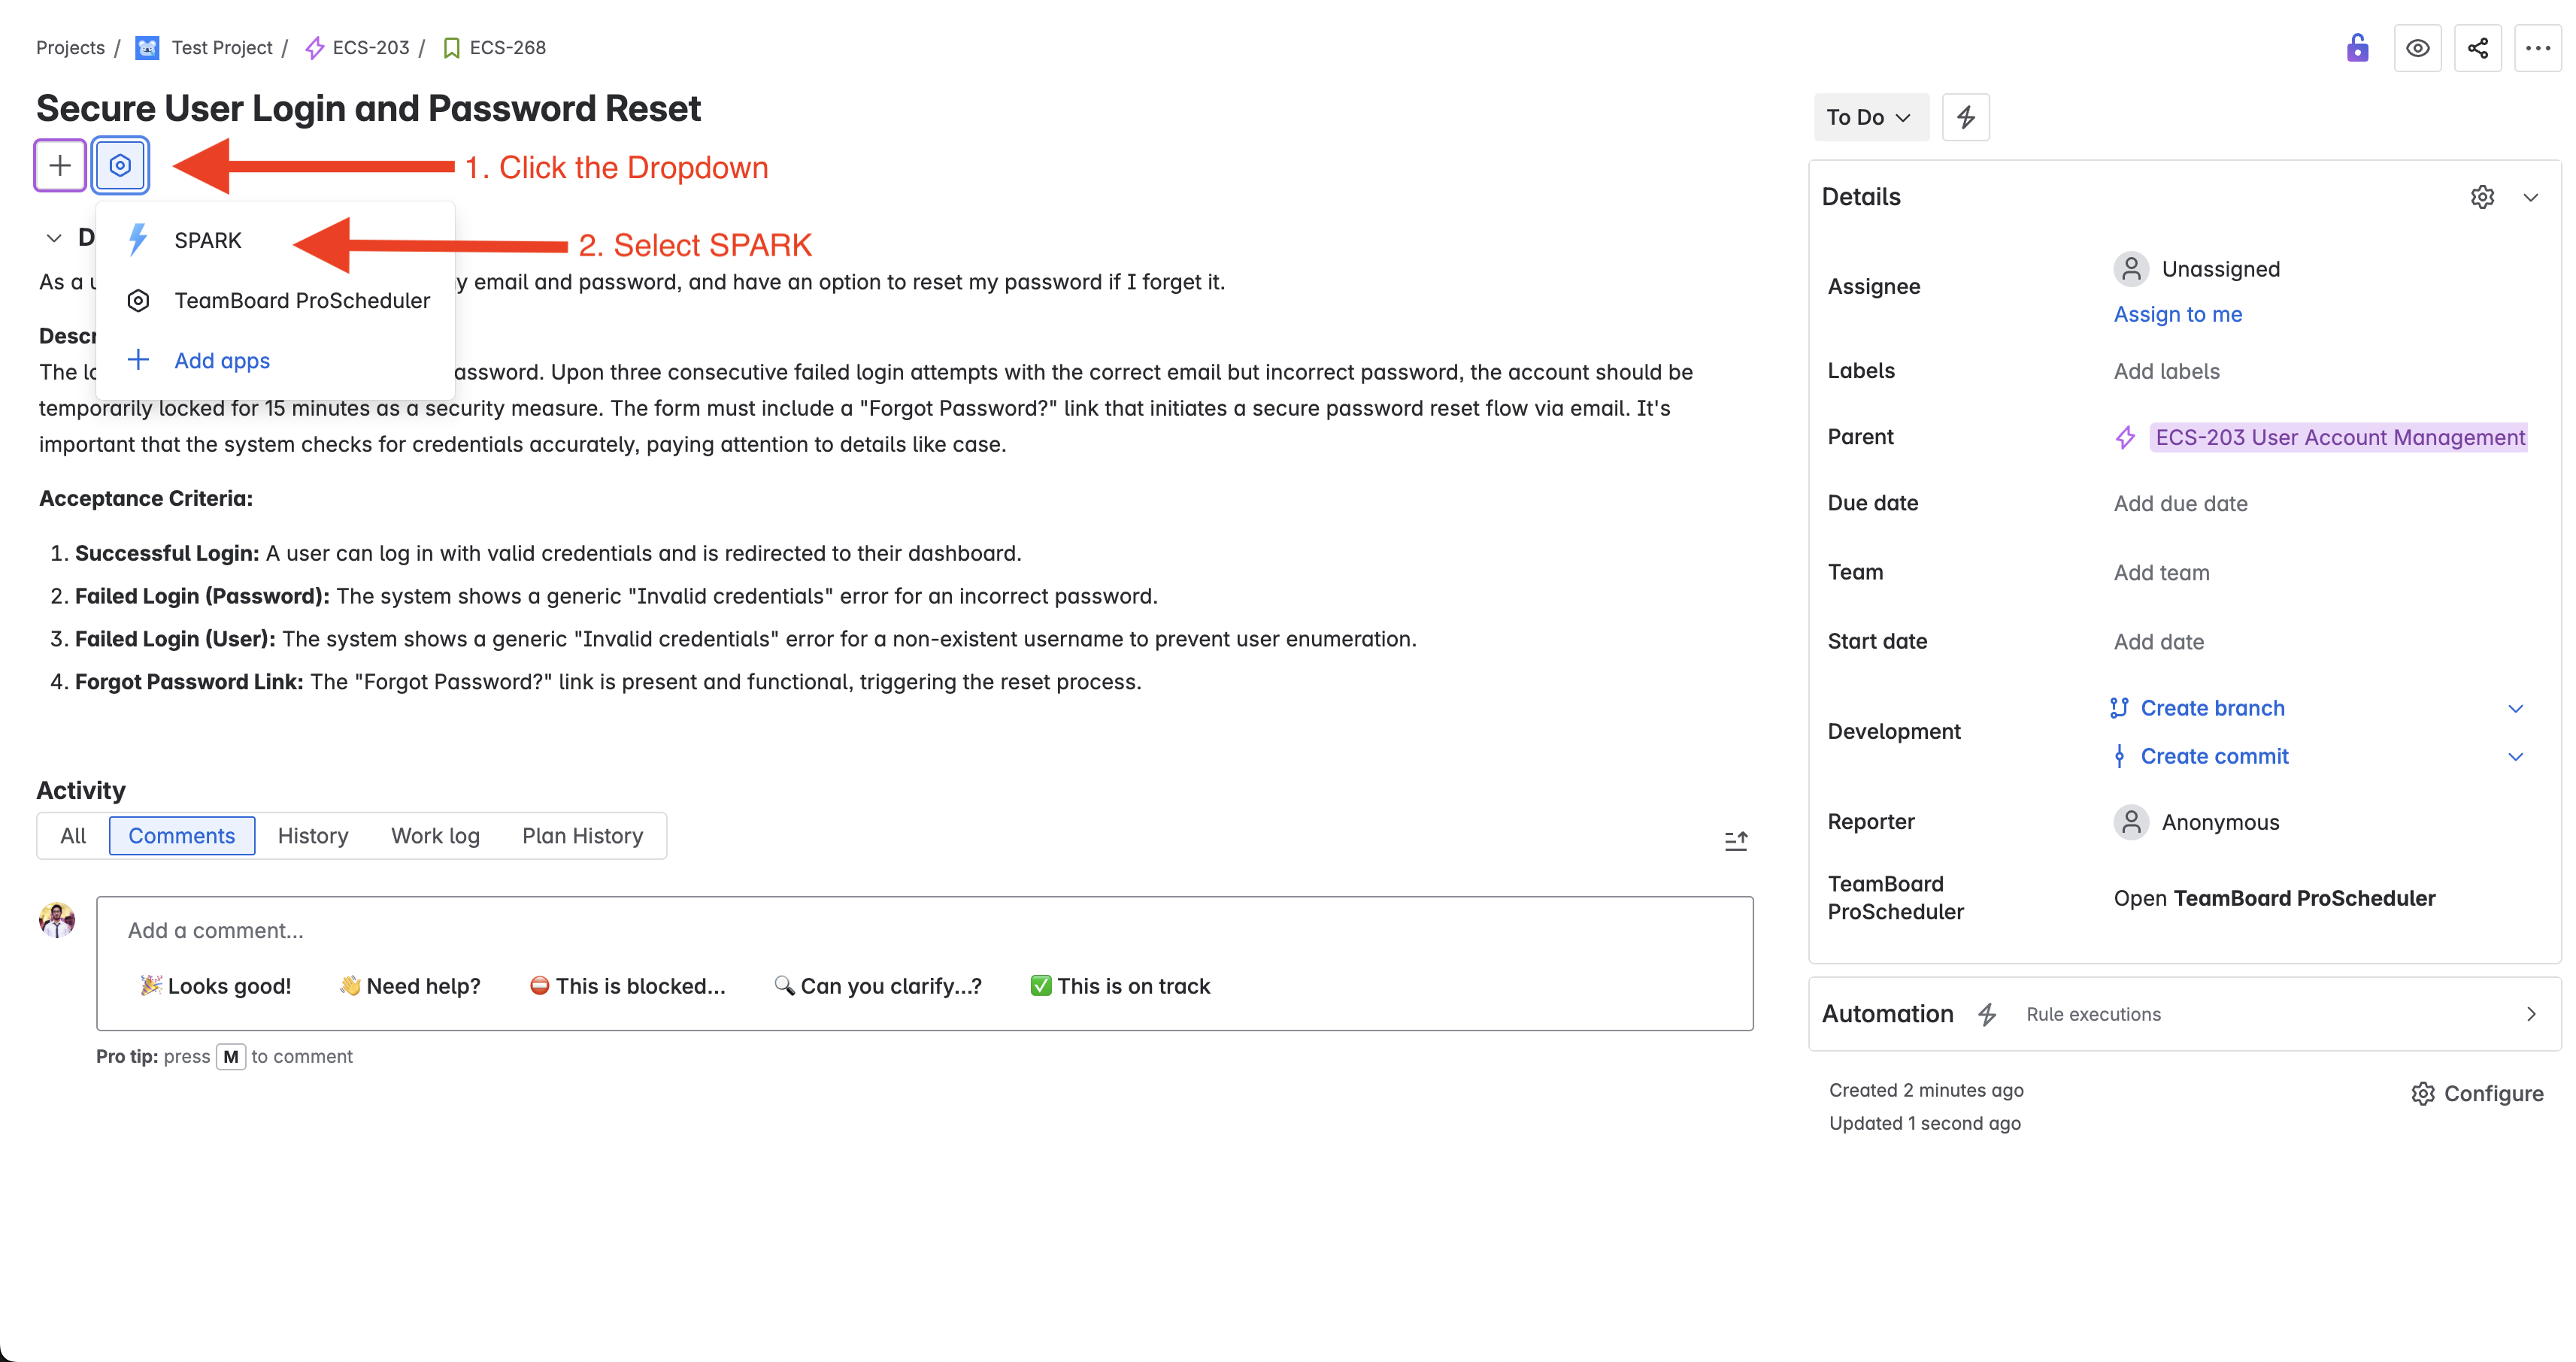
To start using SPARK, you'll need to access it from within a Jira ticket. Follow these simple steps:
- 1 Open any Jira ticket in your project
- 2 Look for the dropdown button next to the plus sign in the ticket toolbar
- 3 Click the dropdown and select SPARK from the menu
SPARK must be installed in your Jira instance before it appears in the dropdown menu. If you don't see SPARK listed, contact your Jira administrator to install the plugin.
2.Configure API Key (First Time)
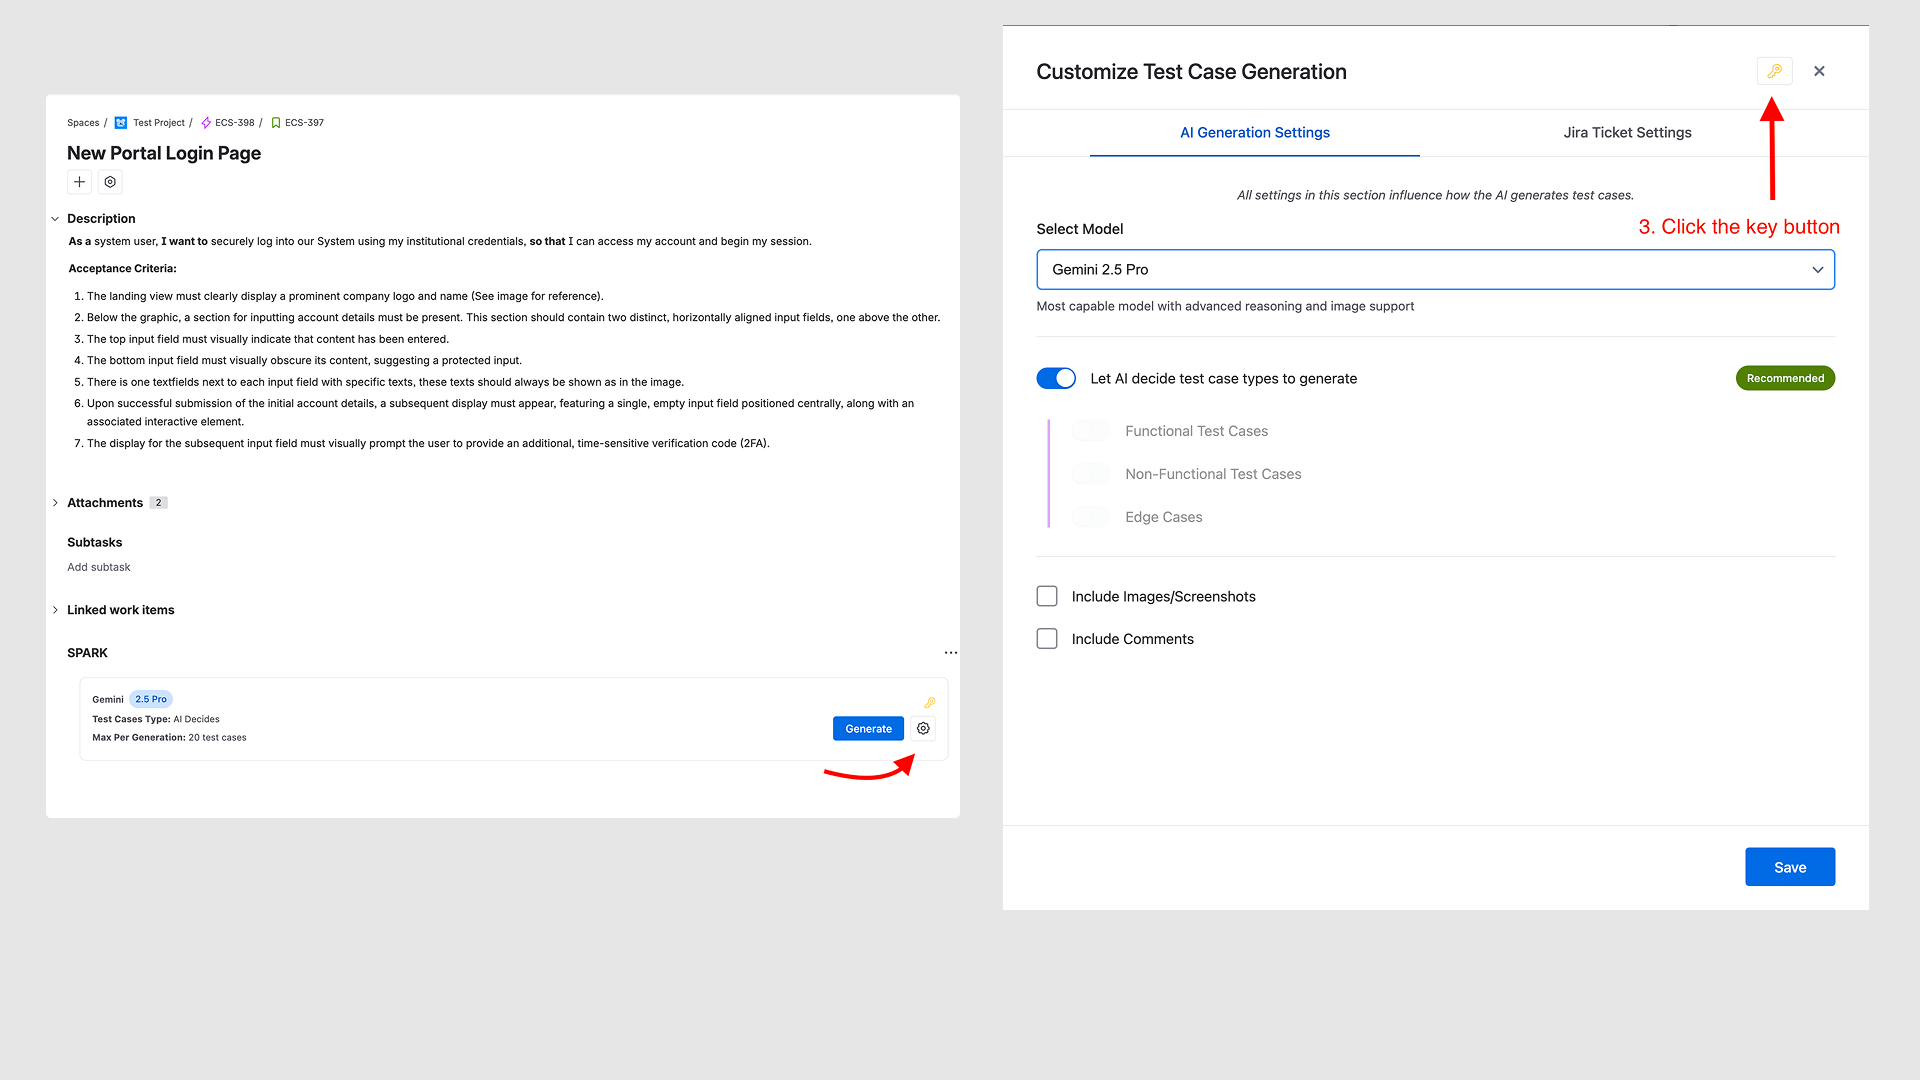
To configure your API key, follow these steps to navigate to the admin page:
- 1 Click the gear icon next to the Generate button to open the Customize dialog
- 2 In the Customize dialog, look for the key icon at the top right. It will appear blue if no key is configured, or golden if a key is already set up
- 3 Click the key icon to navigate to the admin page where you can configure your API key
The key icon button is only clickable by users with admin permissions. If you're not an admin and need SPARK configured, contact your Jira administrator to complete the API key setup process.
3.Access the Admin Key Management Portal
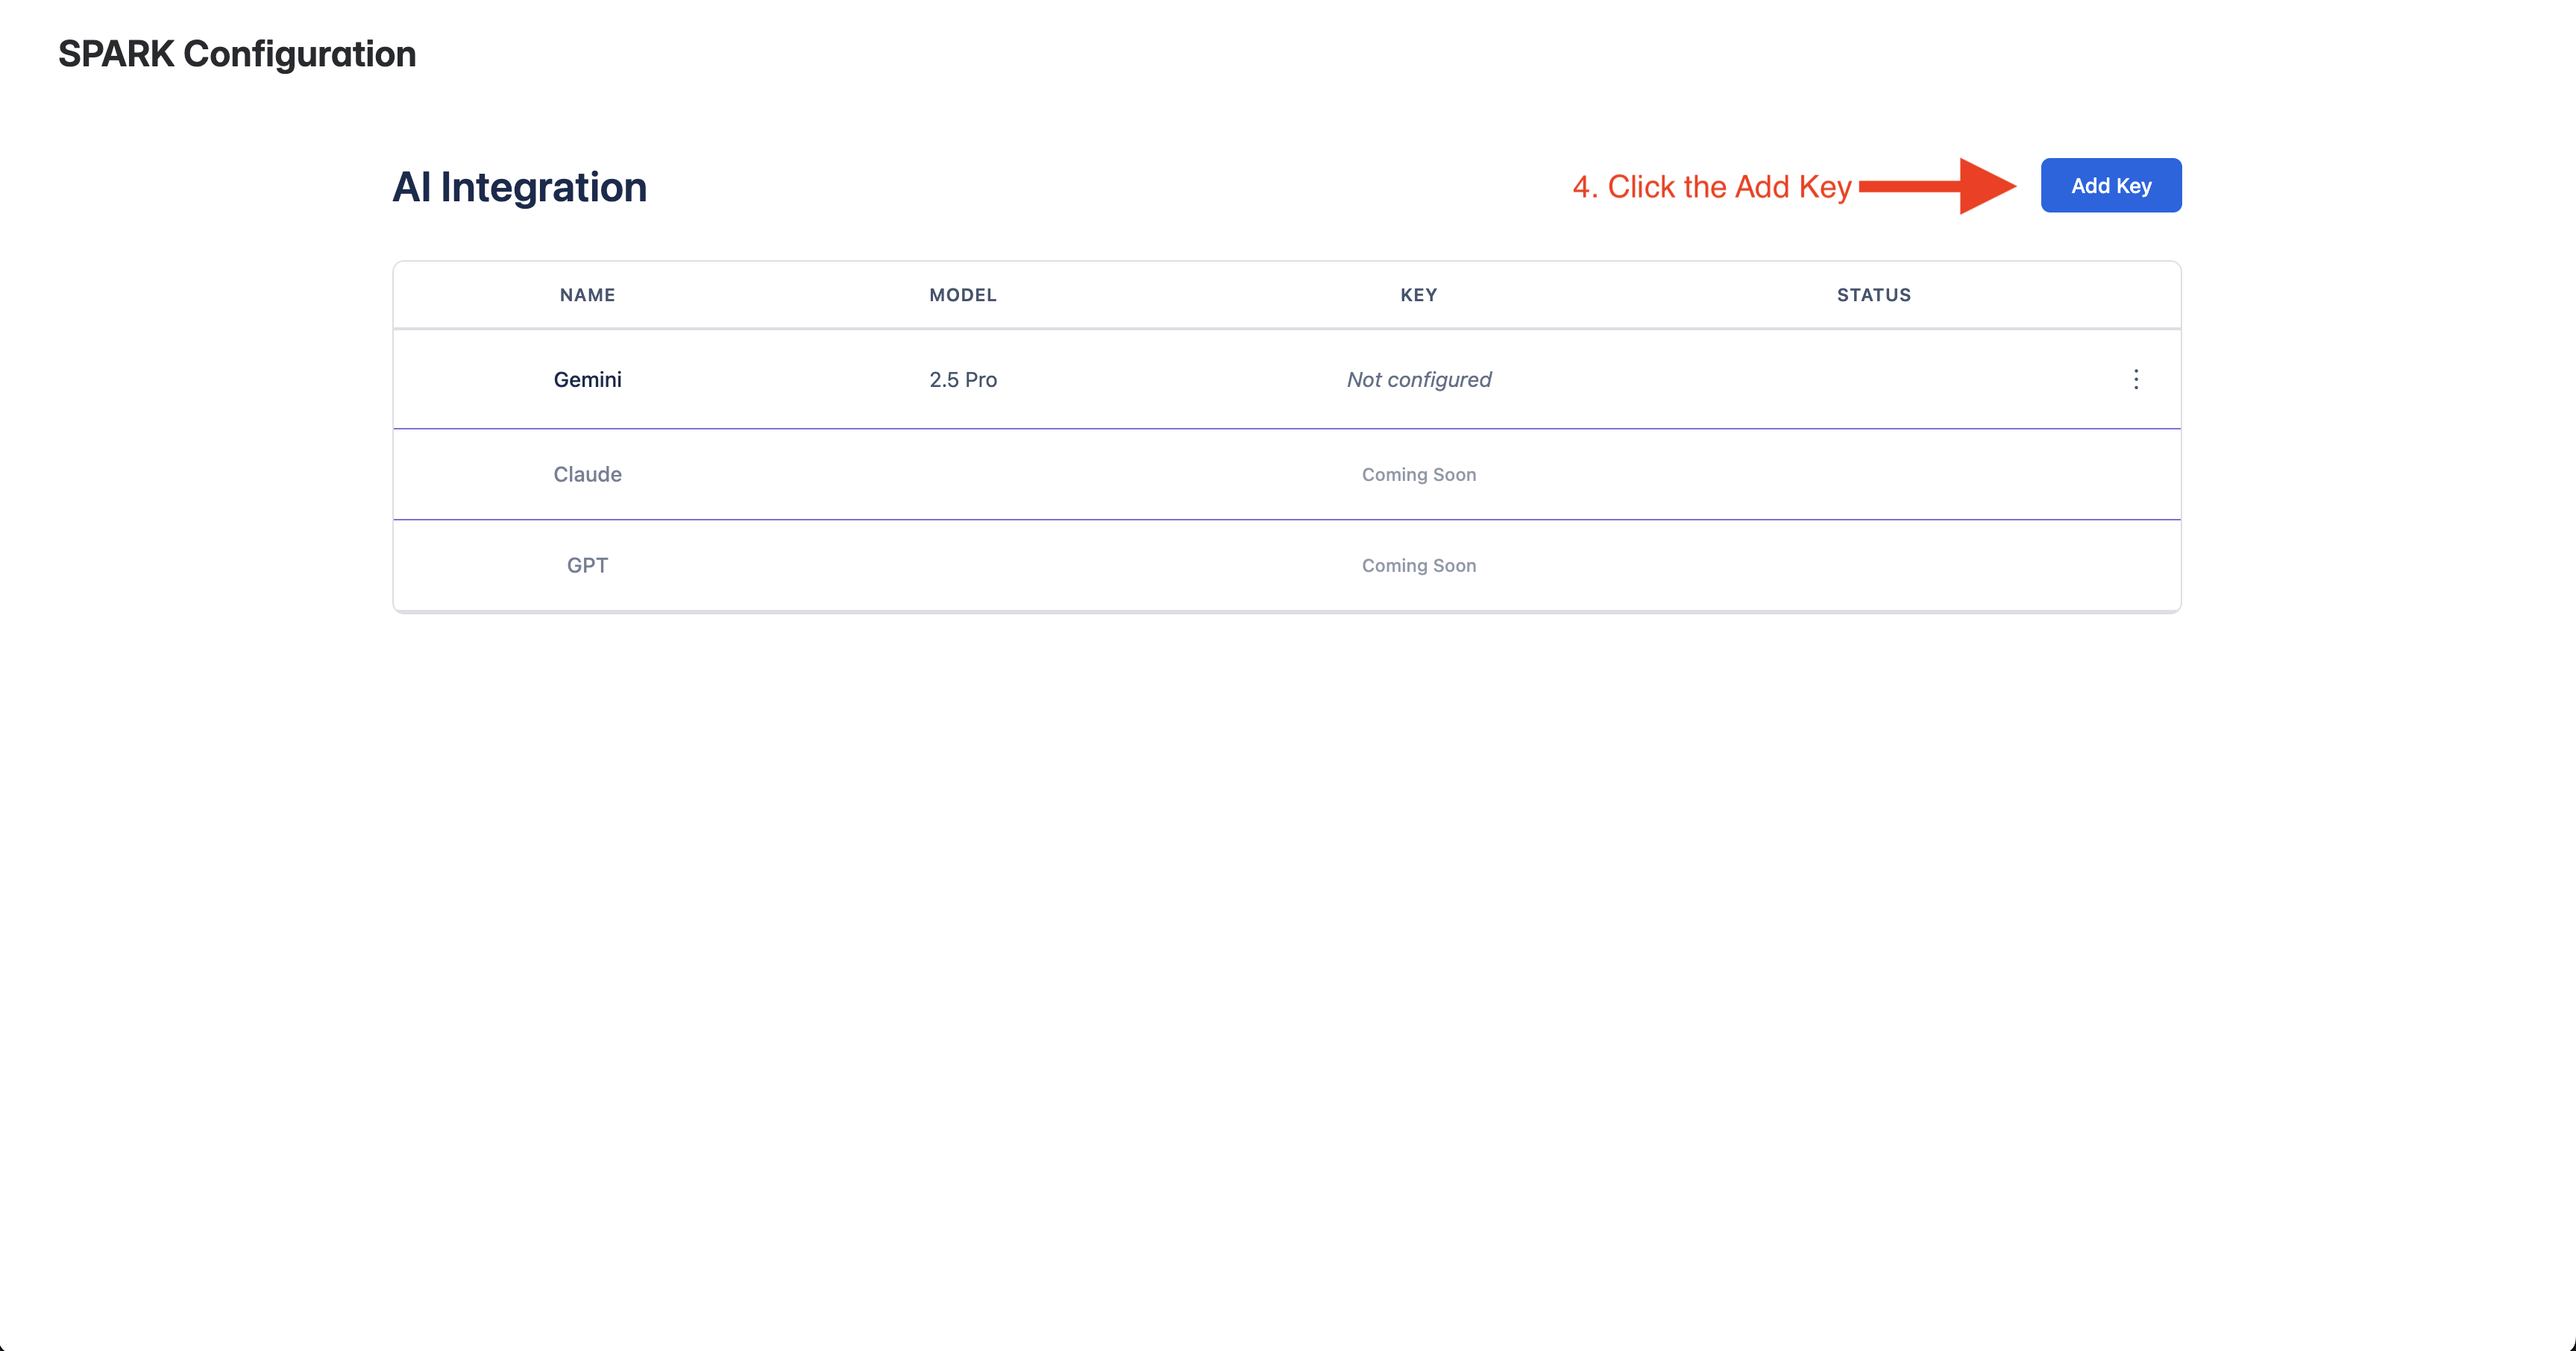
This step can only be performed by Jira administrators. Regular users will not have access to the key management portal and should contact their administrator to complete this configuration.
After clicking "Configure API Key", administrators will be taken to the SPARK key management portal. Here's how to access and use it:
- 1 The system will automatically redirect you to the SPARK Admin Portal
- 2 Look for the "Add Key" button in the key management interface
- 3 Click the "Add Key" button to open the API key configuration dialog
Once you click "Add Key", you'll be presented with the API key configuration dialog where you can enter your Gemini API credentials.
4.Configure Your Gemini API Key
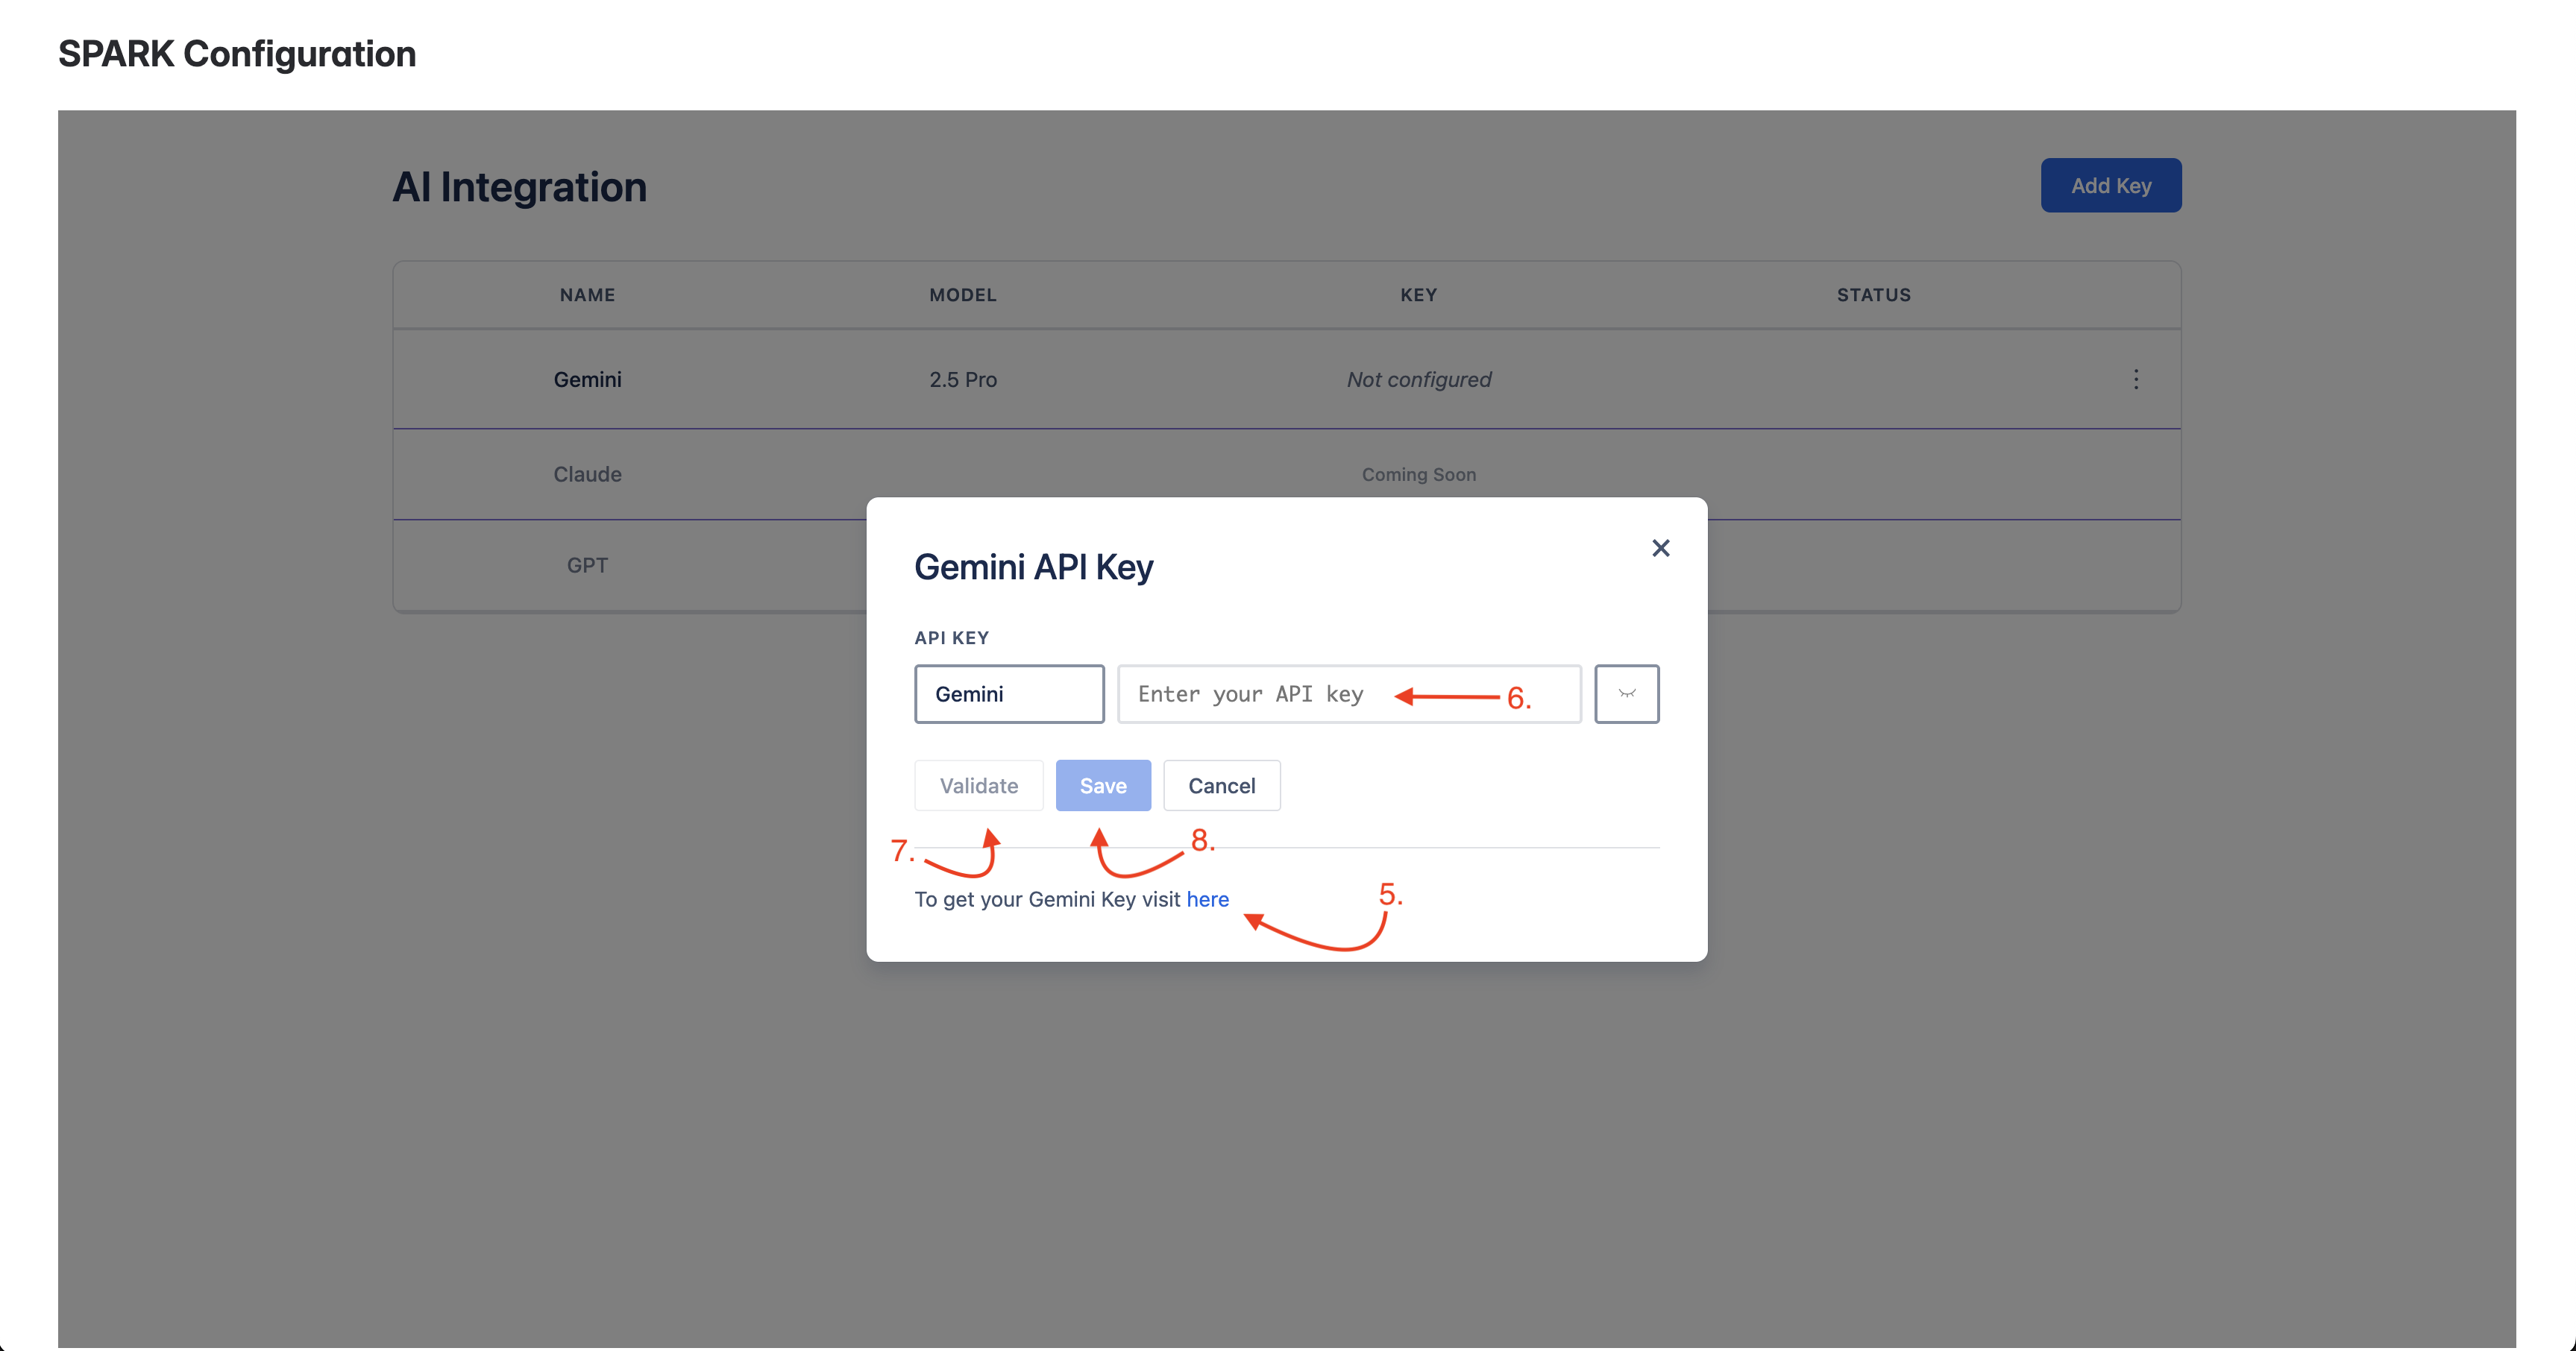
In the API key configuration dialog, you'll need to enter your Gemini API credentials. Follow these detailed steps:
-
5
Enter the Gemini API URL in the designated field This is typically the base URL for Google's Gemini API service
-
6
Input your API Key in the secure input field Your API key will be masked for security purposes
-
7
Click the "Validate" button to test your credentials This ensures your API key is working before saving
-
8
Once validated, click "Save" to store your configuration Your settings will be securely saved for all users in your Jira instance
If you don't have a Gemini API key yet, you can obtain one from Google's official documentation:
Get Gemini API Key- • URL Field: Enter the Gemini API endpoint
- • Input Field: Secure API key entry (masked)
- • Validate Button: Test credentials before saving
- • Save Button: Store configuration for your team
5.SPARK Successfully Configured
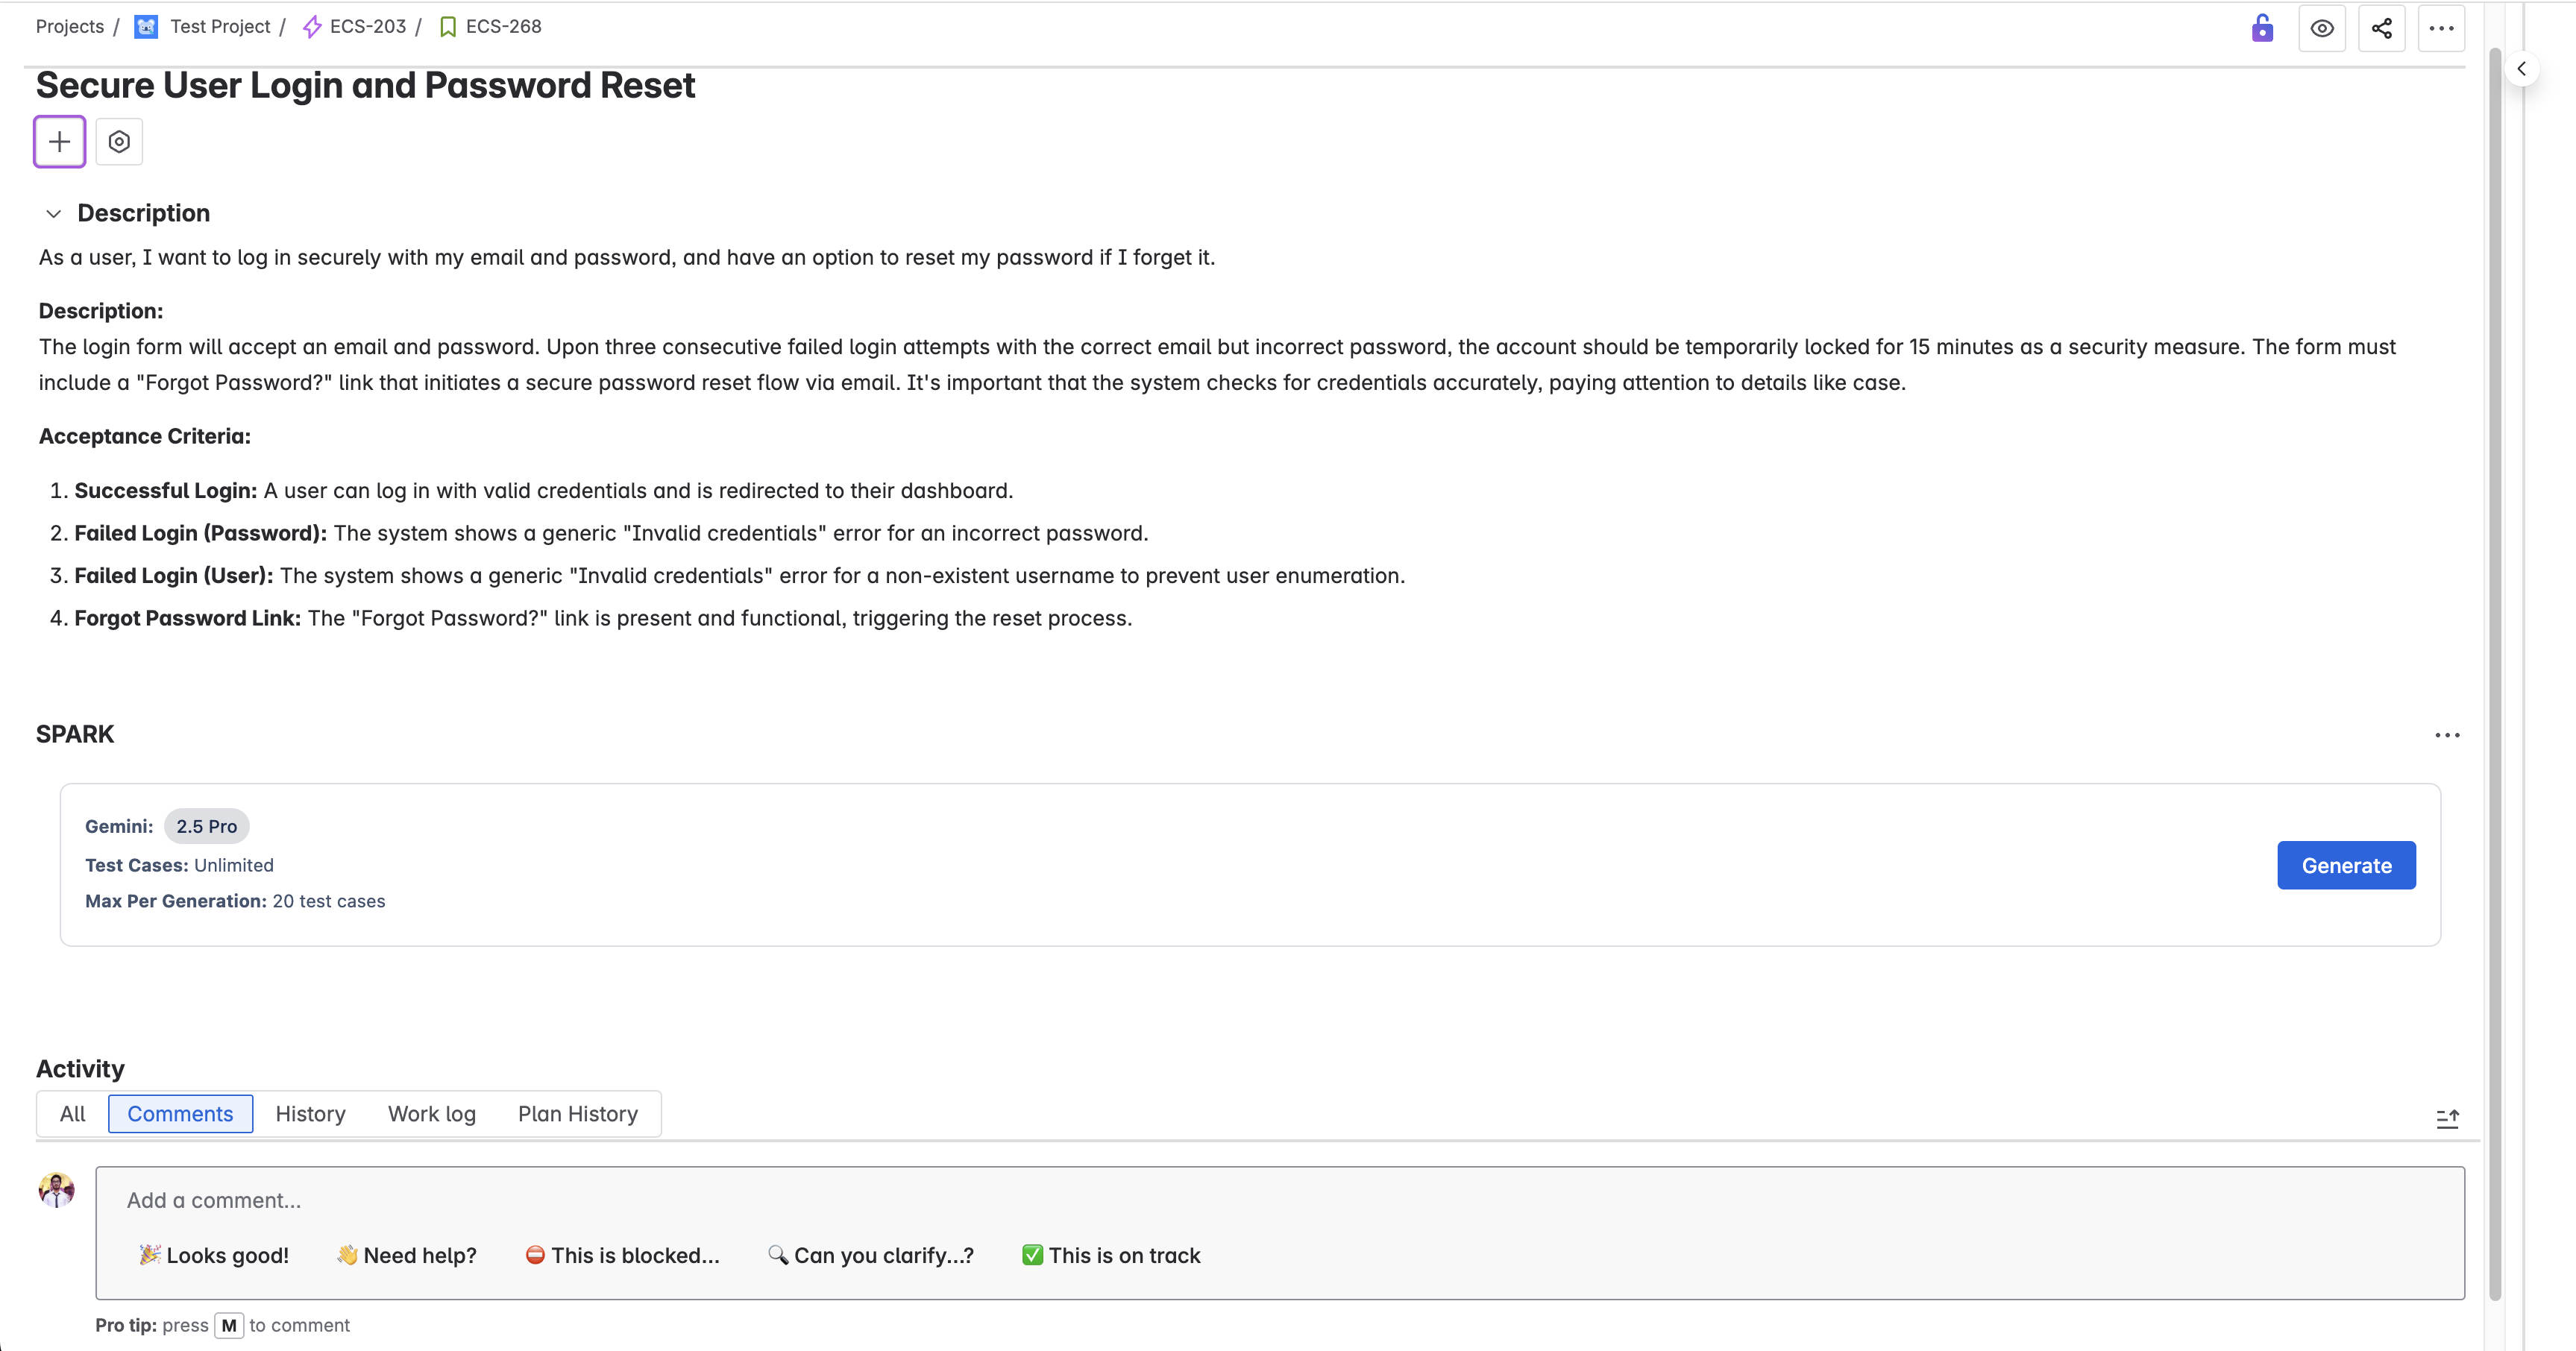
Congratulations! SPARK is now fully configured and ready to use. Here's what you'll see in the SPARK interface:
SPARK Interface Elements:
-
AIAI Model Selection Shows the configured Gemini AI model that will generate your test cases
-
#Test Case Limits Displays the maximum number of test cases that can be generated per request
-
⚡Generate Button Click this button to start generating AI-powered test cases for your Jira ticket
What You Can Do Now:
- 1 Generate Test Cases: Click the generate button to create comprehensive test cases based on your ticket content
- 2 Review AI Suggestions: Examine the generated test cases and modify them as needed
- 3 Save to Jira: Add the approved test cases directly to your Jira ticket
SPARK is now ready to use! You can start generating AI-powered test cases for any Jira ticket in your project.
Next Steps:
- • Navigate to any Jira ticket and access SPARK from the dropdown menu
- • Click the generate button to create your first set of test cases
- • Explore SPARK's AI capabilities across different types of tickets
- • Share this setup guide with your team members